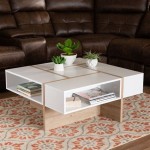
Easy Coffee Table DIY: Step-by-Step Guide for a Stylish Addition to Your Living Room
Coffee tables serve as the centerpiece of your living room, offering a functional space for displaying decor, setting down drinks, and stretching out your feet. While buying a coffee table can be a costly affair, creating your own DIY coffee table is a budget-friendly and rewarding project that adds a personal touch to your living space. In this comprehensive guide, we will walk you through the step-by-step process of building an easy coffee table that combines style, functionality, and affordability. From gathering materials to assembling the table, we've got you covered. So, let's get started! ### Materials Required: - 1.5-inch thick plywood (cut to desired table size) - 4 wooden legs (approx. 16-18 inches in height) - Wood screws - Wood glue - Sandpaper - Paint or stain (optional) - Finishing sealant - Measuring tape - Saw - Drill - Screwdriver - Paintbrush (if painting) - Wood clamps (optional) ### Step-by-Step Guide: 1.Measure and Cut the Plywood:
- Measure and mark the desired dimensions of your coffee table on the plywood. - Use a saw to cut the plywood according to your markings. Ensure straight and precise cuts. 2.Sand the Edges:
- Sand the edges of the plywood to remove any roughness or splinters. This will create a smooth finish and prevent injuries. 3.Attach the Legs:
- Position the wooden legs at the corners of the plywood. - Use wood screws to securely attach the legs to the plywood. Ensure the screws are long enough to provide a firm hold. 4.Reinforce the Joints:
- For added stability, apply wood glue to the joints between the plywood and the legs. - Use wood clamps to hold the pieces together while the glue dries. - Allow the glue to dry completely according to the manufacturer's instructions. 5.Sand the Surface:
- Once the glue has dried, sand the entire surface of the coffee table to achieve a smooth and even finish. 6.Paint or Stain (Optional):
- If desired, apply a coat of paint or stain to the coffee table. This step is optional and allows you to customize the look of your table to match your décor. - Allow the paint or stain to dry completely before proceeding. 7.Apply Finishing Sealant:
- To protect the coffee table from spills and wear, apply a coat of finishing sealant. This will help preserve the finish and make the table more durable. - Allow the sealant to dry completely according to the manufacturer's instructions. 8.Enjoy Your New Coffee Table:
- Once the sealant has dried, your DIY coffee table is ready to use! Place it in your living room and style it with your favorite décor items. ### Additional Tips for a Successful DIY Coffee Table: - Use high-quality materials for a sturdy and long-lasting coffee table. - Cut the plywood and legs accurately to ensure a proper fit. - Pre-drill holes for the screws to prevent splitting the wood. - Apply multiple coats of paint or stain for a richer and more even finish. - Consider adding decorative elements like handles or trim to enhance the design. - Measure your living room space before building the coffee table to ensure it fits proportionally. With careful planning, attention to detail, and a bit of effort, you can create a stunning DIY coffee table that will add charm and functionality to your living room for years to come. Happy crafting!
More Like Home Easy Industrial Farmhouse Coffee Table Day 6

More Like Home Easy Minimalist Diy Coffee Table Day 13

12 Diy Coffee Tables How To Make A Table
:max_bytes(150000):strip_icc()/Coffee-Table-3-5a0b3602e258f80037d29b38.jpg?strip=all)
19 Free Diy Coffee Table Plans You Can Build Today

Easy Diy Outdoor Coffee Table Build

Rustic Industrial Coffee Table The House Of Wood

Build A Diy Coffee Table Basic

The 50 Modern Patio Coffee Table Easy Diy Project

Diy Coffee Table 16 Designs Bob Vila

More Like Home Round Coffee Tables 4 Easy To Build Styles Day 10

