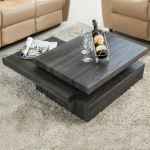
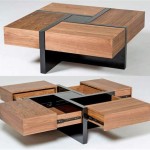
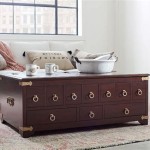
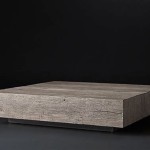
DIY Easy Coffee Table: Elevate Your Living Space with a Personalized Touch
Embark on a rewarding journey of crafting your own coffee table, adding a personalized charm to your living space. With readily available materials and straightforward steps, this DIY project promises to transform your living room into a haven of comfort and style. ### Materials Needed: - Four wooden pallets (ensure they are sturdy and in good condition) - Sandpaper (coarse and fine grit) - Wood screws (2 inches and 1 inch lengths) - Drill or screwdriver - Wood stain or paint (optional, based on your desired finish) - Clear sealant (optional, for added protection) - Casters or furniture legs (optional, for mobility or elevation) ### Detailed Instructions: 1.Preparation:
Begin by thoroughly sanding the pallets using coarse-grit sandpaper. This step removes any splinters or rough edges, ensuring a smooth and even surface for your coffee table. 2.Disassembly:
Carefully disassemble the pallets to separate the wooden slats. Use a pry bar or hammer to gently detach the slats without damaging them. 3.Sanding and Staining:
Take each slat and sand it using fine-grit sandpaper. This step refines the smoothness of the wood and prepares it for staining or painting. If you prefer the natural look of wood, you can skip this step. 4.Assembly of the Tabletop:
Arrange the slats in a rectangular or square formation, depending on your desired table shape. Join the slats together using 2-inch wood screws, ensuring they are securely fastened. For added stability, reinforce the joints with additional screws. 5.Attaching the Base:
Determine the height you want for your coffee table. If you prefer a lower profile, you can directly attach the tabletop to the floor using 1-inch wood screws. For a taller table, attach furniture legs or casters to the corners of the tabletop using the same screws. 6.Finishing Touches:
Once the table is assembled, you can add your personal touch with a coat of stain or paint. Apply the chosen finish evenly using a paintbrush or roller. Allow the finish to dry completely before moving on to the next step. 7.Seal and Protect:
To protect your coffee table from spills and general wear and tear, consider applying a clear sealant. This step enhances the durability and longevity of your handmade piece. 8.Enjoy Your Creation:
Position your DIY coffee table in your living space and style it with decorative items such as a vase of flowers, coasters, or a tray of candles. Step back and admire your handiwork—you've created a unique and functional piece that reflects your personality and adds warmth to your home. ### Optional Customization Ideas: - Incorporate a glass or plexiglass top to protect the tabletop and add a modern touch. - Add a drawer or shelf underneath the tabletop for additional storage space. - Experiment with different staining or painting techniques to achieve a distressed, rustic, or vibrant look. - Attach wheels or casters to the base for easy mobility. With a little creativity and effort, you can craft a DIY coffee table that perfectly complements your living room décor and serves as a cherished piece in your home for years to come.
More Like Home Easy Industrial Farmhouse Coffee Table Day 6

12 Diy Coffee Tables How To Make A Table

More Like Home Easy Minimalist Diy Coffee Table Day 13

Easy Diy Outdoor Coffee Table Build

Simply Easy Diy Coffee Table

25 Gorgeous Diy Coffee Table Ideas To Build This Weekend Insteading

Rustic Industrial Coffee Table The House Of Wood

The 50 Modern Patio Coffee Table Easy Diy Project

20 Easy Free Plans To Build A Diy Coffee Table Modern Farmhouse Decor Decoración De Unas Muebles Para El Hogar

Modern Coffee Table Using 2x4 S Easy 3 Hour Project Built In One Day Wood

